ServiceDesk Simulator

The Support Toolkit · Module 13 of 16

Computer Deployment

How a bare laptop becomes somebody’s work computer, by hand and then at scale. Imaging, task sequences and what replaced them.

A laptop out of a box needs a build, a name, a domain and an owner in inventory before anybody can work on it. This module is the distance between the box and the work computer.

Part one

On the job

The standard build, imaging, task sequences, and the shift to a machine the technician never touches.

The standard build

Walk up to any laptop in a well-run company and a technician there can tell you what is on it before it is opened. Same operating system, same version, same apps, same security settings, same disk encryption, same local administrator account, same name format.

Standard build
The agreed definition of a company machine: OS version, applications, settings, security baseline. Sometimes called the SOE, the standard operating environment.
Gold image
A captured snapshot of one machine built to that definition, and the source for every other machine. Also called a reference or master image.
Baseline
The security and configuration settings applied on top: password policy, encryption, firewall, logging, whatever the company has decided is non-negotiable.

The benefit lands on the support desk: a fix proven on one machine works on the rest.

Why sameness is worth the effort

Every machine the same

  • A fix that worked on one works on all of them.
  • A fault on one is worth investigating as a fleet problem.
  • A technician who has never seen this user can navigate their PC blindfolded.

Everyone builds their own way

  • Every ticket becomes a fresh investigation.
  • Two supposedly identical laptops behave differently and nobody can say why.
  • Nothing you learn on one machine transfers to the next.
Same paths, same versions, same account names, on every machine a technician opens.

The standard build is written down. Ask for that document on your first day at a new job: it names the OS version, the applications, the settings and the security baseline every machine is supposed to have.

Building one by hand

Start with the hand build. Unbox the machine, cable it up, and walk this list in order: every automated method in this module is the same list with the typing removed.

StepWhat it is for
Bench and boot Power, network, display, then the out-of-box setup: region, keyboard, network, license terms.
OS and drivers The factory build is rarely the version you standardize on, and the vendor driver pack for the model replaces whatever generic drivers shipped on it.
Apps and settings The applications and the security baseline that turn a computer into a company machine.
Name it To the convention, matching the asset tag, before the join.
Join the domain The step that turns a standalone computer into a company one. Restart, then sign in once as a real user to prove it took.
Record it Into inventory, with the asset tag, the hostname and the person it goes to.

Drivers

A generic driver gets you a screen and a mouse, and also poor battery life, no fingerprint reader and a trackpad that ignores gestures. The vendor driver pack is the fix, one per model. On a hand build you run the pack; in an image you inject the drivers so setup finds them.

pnputil /add-driver C:\drivers\*.inf /subdirs /install

Driver work is also where hand-built machines quietly diverge. One technician installs the current pack, another installs whatever was on the share last year, and eighteen months later the two machines behave differently.

The name

A machine name is how that machine appears in the directory, the monitoring console, the patch report, the license count, and the log line that says which PC just tried to authenticate four hundred times. A good convention encodes something you would otherwise have to look up.

LON-LT-04217   site / device type / asset number

Companies differ on what goes in it, and encoding a department is arguably a mistake, because people move desks and the name becomes a lie. The constant is the rule: a convention issues the name, and it usually matches the asset tag on the case, so the object and the database row agree.

Joining the domain

The join is what turns a standalone computer into a company computer. It creates a computer account in the directory, gives the machine its own credentials, and from then on the machine receives policy, is findable by management tools, and lets domain users sign in with their own accounts. It needs three things: a reachable domain controller, DNS that resolves the domain, and an account with the delegated right to join. Any one of them missing produces a failure message that blames something else.

Every machine gets its own local administrator password. One build-wide local admin password is a textbook lateral-movement risk: learn it on one machine and you have it on all of them. Windows LAPS, the local administrator password solution, sets a unique password on each machine’s local admin account and rotates it, keeping the current one in the directory for the rare time a technician needs it. What LAPS is, and why a shared local admin password is dangerous, is a common interview question.

Imaging: build once, lay it down many times

Doing the previous page forty times is a week of somebody’s life. Imaging replaces it: build one machine perfectly, photograph its disk, and pour that photograph onto every other machine.

Reference image
The one machine you build carefully, by hand, to the documented standard. It is a build artifact, owned by the build process and rebuilt whenever the standard moves.
Sysprep
The tool you run before capturing. It generalizes the installation, clearing the machine name, the driver bindings, the activation state and the identifiers management tools key on, and leaves the image ready to run setup again on first boot. It regenerates the machine security identifier too.
WIM
The Windows Imaging file format. File-based rather than sector-based, which means one WIM can hold several images, can be mounted and edited offline, and only stores duplicate files once.
PXE
Preboot Execution Environment. The network card asks the network for something to boot and a deployment server answers with a boot image, which is why a machine with a blank disk can still start an install.
WinPE
The small preinstallation environment that PXE boot actually loads: enough Windows to partition a disk, talk to the network and apply an image.

The imaging pipeline

Reference image
Sysprep
Capture to WIM
PXE boot
Apply and set up
Keep the reference image thin: the operating system, the drivers, and the few things that have to be baked in. A fat image is out of date the day it is captured.

The generalize step is the one people skip and regret. What sysprep resets is the identity baked into the disk. Clone without it and every machine inherits one update-client ID and one management-agent identifier, so the patch console and the deployment console fold the whole batch into a single record that keeps changing its name. Activation state and its rearm count travel with it, and Microsoft supports only an image that was generalized before capture. The machine security identifier is the reason people quote and the weakest one on the list: a machine that joins a domain is issued a computer account with its own unique domain SID regardless, and Mark Russinovich retired his own SID-changing tool over exactly that.

Somebody else already built the image. The reference image, the sysprep run, the capture and the task sequence that lays it all down belong to a system administrator or a deployment engineer, working in a console a first-line account has no rights to. It is built once, kept current as the standard moves, and reused for months. Your half is the machine on the bench: cable it, boot it at the deployment server, give it the name the convention asks for, and let the sequence run. Knowing how the image got there is what an interview asks for.

The task sequence

At scale, the imaging server is Microsoft Configuration Manager, which almost everyone still calls SCCM from its old name, System Center Configuration Manager. Its deployment half is called OSD, operating system deployment, and the thing it runs is a task sequence.

A task sequence is an ordered list of steps a machine executes unattended: partition and format disk 0, apply the operating system image, apply drivers for this model, join the domain, install these applications in this order, restart between phases. You build it once in a console, and every machine that runs it gets the same result in the same order.

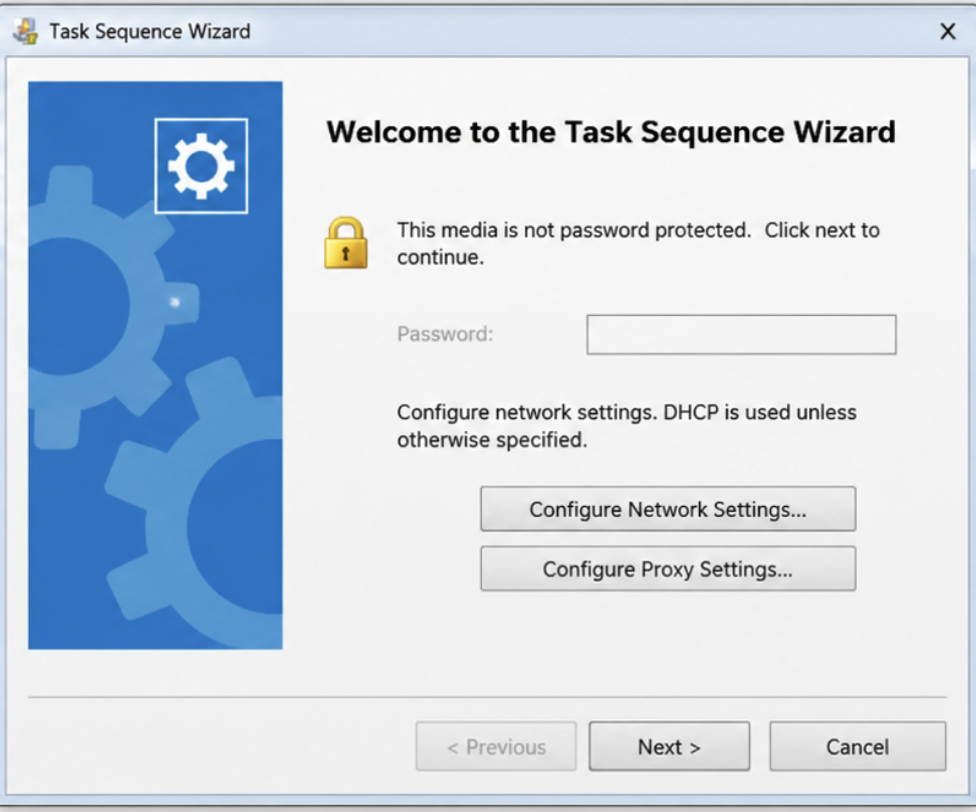
The Configuration Manager Task Sequence Wizard on a machine booted from imaging media, headed "Welcome to the Task Sequence Wizard", with the line "This media is not password protected", an empty Password field, buttons for Configure Network Settings and Configure Proxy Settings, and Previous, Next and Cancel along the bottom.
The real wizard, on a machine that has just booted off the network. An engineer builds the sequence itself in a console back at a desk; this is the one screen the machine puts in front of whoever is standing at it, and it holds almost nothing: a password box, and network and proxy settings for when DHCP is not enough. This media is not password protected is why that box is greyed out here and the instruction is simply to click next. A boot image with no password will run for anybody who can reach the imaging server, which is why PXE and boot media are normally password protected, and why that box is usually the first thing a technician fills in.

Microsoft Configuration Manager is a trademark of Microsoft Corporation. ServiceDesk Simulator is not affiliated with, endorsed by, or sponsored by them.

The three words an interview asks for

Distribution point The server near the machines that actually holds the content, so a branch office pulls its twelve gigabytes from down the hall.
Boot image The WinPE that PXE hands out.
Task sequence variables Decisions carried into the run. The one everybody meets is OSDComputerName, which is how the machine gets its name before it has one.
MDT, the Microsoft Deployment Toolkit, was the lighter relative: same idea, free, driven by a deployment share and answer files. Plenty of smaller companies ran on MDT alone for years and plenty still do, but Microsoft retired it in January 2026, so it is frozen at the version that shipped.

A task sequence is at its best on the machine that must be identical to the hundred next to it, on a network you control, with software the cloud cannot deliver. The laptop that will never be in the building is what the next page is about.

What replaced it for laptops

Imaging assumes the machine and the technician are in the same room. In 2020 that assumption broke, and remote work has kept it broken since. PXE boot needs the machine on your own network, and shipping a laptop to an office to be imaged and shipped out again is two weeks and two couriers for nothing.

The answer is modern provisioning: the device is registered to the company at the factory by its hardware identity, ships sealed from the vendor to the person who will use it, and configures itself the first time they sign in.

Windows Autopilot
The registration and first-run service. The vendor uploads the device’s hardware hash to the company tenant; when the machine reaches the internet it recognizes itself as theirs and downloads a provisioning profile.
Intune
The management service that then does the work: pushes policy, applications, certificates, encryption and the security baseline to the device. Microsoft branded it and its siblings Endpoint Manager for a couple of years, so you will still hear that name, but the family carries the Intune name now.
Entra ID join
The cloud equivalent of the domain join. The device gets a cloud identity instead of, or alongside, a computer account in an on-premises directory.
Enrollment Status Page
The screen the user stares at while all of that happens. It generates the support call, because it is slow and looks stuck when it is merely working.

A machine nobody in IT ever touches

Hash uploaded
Ships sealed
User signs in
Profile applies
Working day one
Provisioning is slower than imaging, often much slower. What it buys is that the technician is never present, the box is never opened twice, and somebody in another country is working on day one.

The setup really is a few commands. A machine that did not arrive registered is enrolled by running the hardware-hash script on it once: the script reads the serial and the hardware identity and uploads them straight to the company tenant. After that the work is assignment rather than building. A group tag drops the device into the right group, the group carries a deployment profile, and the profile decides the join type, the naming template, which out-of-box screens are skipped and what the person sees on first boot. The operating system on the disk is the one the vendor shipped, and everything company-specific arrives over the internet after the first sign-in.

Every platform has this shape. On the Mac side it is Apple Business Manager plus automated device enrollment, driven by Jamf or Intune. On servers and Linux fleets, configuration management tools like Ansible do the equivalent job: describe the desired state, let the tool make the machine match it. Learn one of these properly and the others are mostly renaming.

In this tool the Cloud Provisioning build is under development. Its method card is dimmed and marked Under development, so this module describes the zero-touch flow, and the tickets that would need it stay out of the queue until the build ships.

Zero-touch, light-touch, heavy-touch

Three words that let you describe any deployment method in one breath. Each of them measures how much of a human the build needs.

Heavy-touch
A person does most of it. Hand builds and hand-run installers. Correct for one-off lab machines and for anything too odd to automate, wrong for anything you do more than a few times a year.
Light-touch
A person starts it and the machine finishes it. PXE boot, answer a couple of prompts, name the machine, then the task sequence runs unattended. This is where most on-premises imaging actually sits.
Zero-touch
Nobody in IT touches the machine. It is registered at the factory, ships to the user, and provisions itself. The technician’s job becomes verifying the result and telling normal slowness apart from a genuine failure.

Most companies run at least two of the three at once, so the question at a desk is which one this person needs.

How much of a human the build needs

Heavy-touchLight-touchZero-touch
Who does the work All of it by handStarted by a personNobody in IT
Where the machine is On your benchOn your networkWherever the user is
What is prepared first NothingAn image and a task sequenceA profile in the tenant
Who prepares that NobodyA deployment engineerAn endpoint administrator
Match the person to the method before you build anything. A call-center agent on legacy software the cloud cannot deliver gets imaged, a shop-floor kiosk gets built by hand and joined to the domain, and a salesperson at home gets zero-touch.

Getting this wrong is expensive. A perfectly built laptop that is missing the one application the person’s job runs on is a rebuild, a second courier and an apology.

Part two

How this works here

Where the two builds live in this tool, the essentials to fall back on, what each screen stands for, and where a finished unit goes next.

The deployment console

Open Tools, then under Infrastructure choose Computer Deployment. The console opens on a menu, because the first decision is which build this person needs.

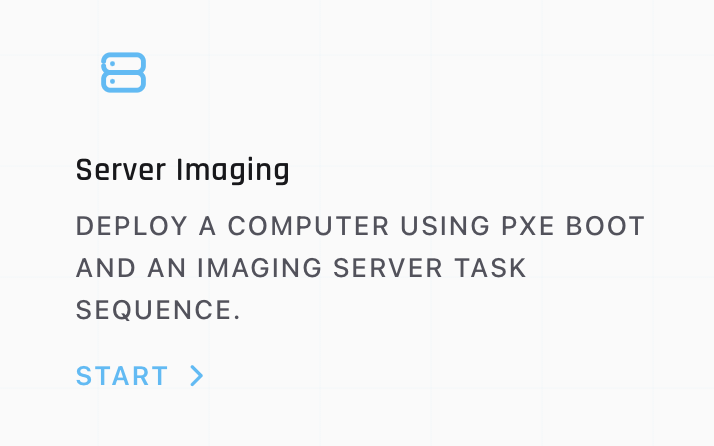
The Server Imaging method card: a server icon, the title, the line "deploy a computer using PXE boot and an imaging server task sequence", and a start control.
One of three cards. Switching method later means discarding the run and starting the other build from the beginning.

The information icon beside the title opens About this tool, a short description of the three methods. Under it sits a line reading Not sure which setup a PC needs? with a Check the documentation link, which jumps to the article in the Documentation station that maps departments to builds.

The three method cards

Server Imaging is the PXE and task-sequence build: the network deployment server lays down the corporate image. Manual Domain Enrollment is the hand build, walked screen by screen and joined to the Directory domain at the end. Cloud Provisioning is the zero-touch build, and it arrives in a later version: its card is dimmed and carries Under development in place of a start action. The queue holds back the tickets that would need it, so every ticket you are handed asks for a machine you can build today.

Each live card ends with Start. Above them is a Hints toggle. Leaving hints on gives you a Hint button on the steps that carry one; taking a hint halves the points for that step, which is still better than guessing wrong. The console recommends turning them off and working from the SOP instead, which is how a real build is done.

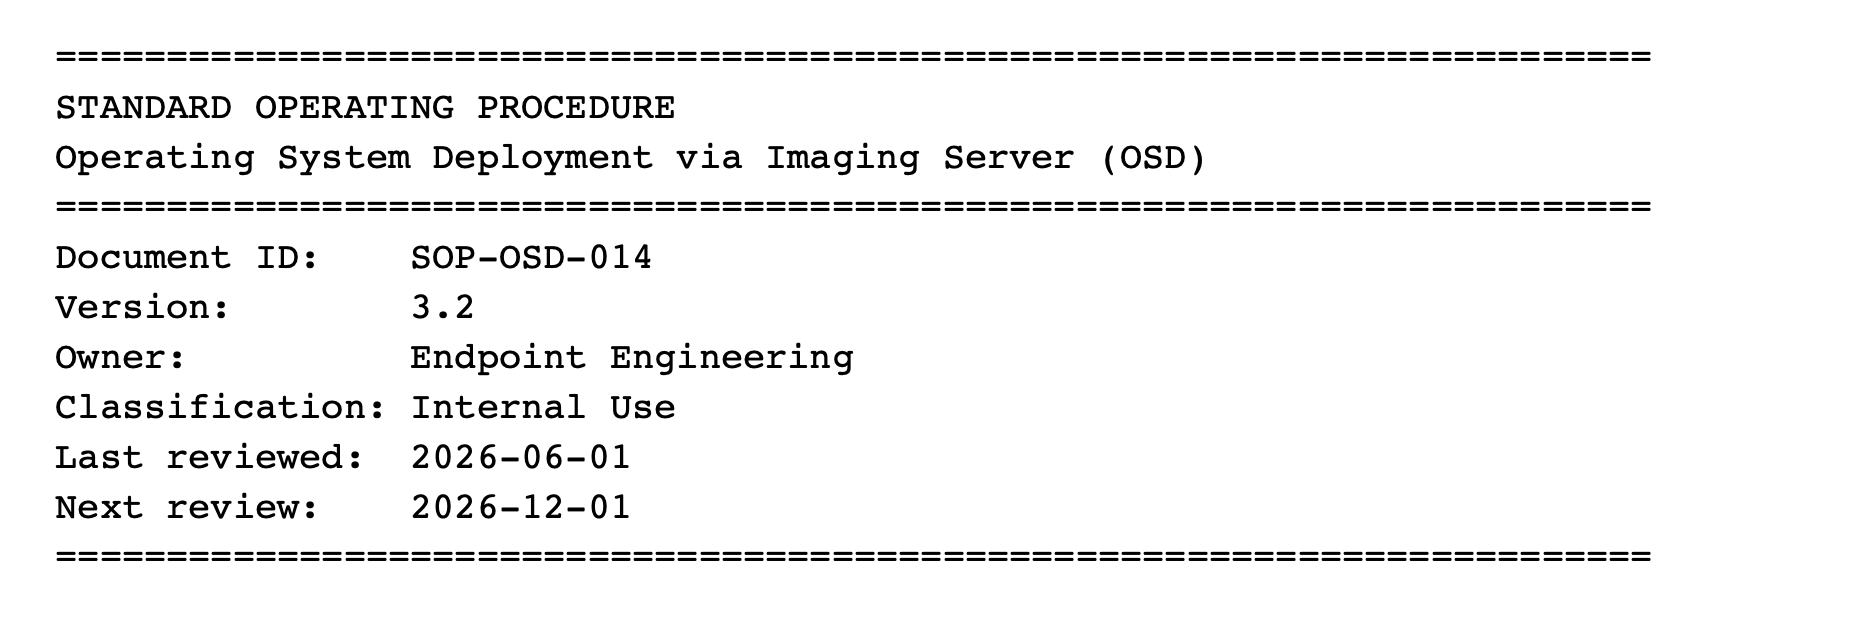
The first screen of either build is that procedure. It is a standard operating procedure, an SOP, that you read and keep, and once the build is running you can reopen it from the SOP control in the heads-up bar, which is there whenever hints are off. It carries the deployment account password, the first-login password and the machine naming convention, which is exactly what a real build runbook carries, though in real life those passwords live in a vault and the runbook points at it. Skim it and you will be guessing at a password screen four steps later.

The top of the deployment standard operating procedure: a document ID, version, owning team, classification and review dates above the procedure itself.
A real runbook opens exactly like this. The version and the review date are how you know the procedure still matches the estate.

Leave a build half finished and it is kept. The menu shows the paused build with a percentage and offers to continue or discard it. Starting a different method while one is paused asks first, because it would wipe the paused run.

Essential build steps, if you get stuck

Both builds are meant to be worked from the SOP with hints off, and most screens explain themselves once you are in them. This is the page to come back to when a step actually stops you: the essentials of each build, and the handful of places people get stuck.

Server Imaging, the short version

Bench the unit and connect every cable. The machine PXE boots over the network, so Ethernet is the cable the build depends on. Power on and tap F12 during POST to catch the one-time Boot Option Menu, then boot from the network adapter on the address family the site answers on, which is IPv4 here. The boot image signs in to the deployment share with a fixed service account, which is why the wizard asks for a password only. Set OSDComputerName to the SD#### convention before the run, or the machine lands under a random hostname. Then leave the unattended run alone until the restarts stop, and sign in once with a domain account to prove the join.

The build signs in with a service account of its own. A build that ran as the technician on shift would carry that person’s rights, and stop working the day they leave. The SOP prints the service-account and first-login passwords so you can finish the build; on a real desk a password vault holds them and the runbook points at it.

Manual Domain Enrollment, the short version

The bench work is the same. From first boot you walk the out-of-box setup by hand, answering region, keyboard and network to the company standard, because the build belongs to the company before it belongs to anybody. Setup then insists on an online account, which is a dead end on a build that has to stay offline: press Shift+F10 to open a Command Prompt and run start ms-cxh:localonly to reach the create-a-local-account handler. The older OOBE\BYPASSNRO trick was removed, so this is the current move; Pro and Enterprise editions also offer a domain-join path during setup itself. Create the local administrator the build needs, finish setup, turn off the privacy toggles a policy would otherwise have set, then open View advanced system settings from the taskbar search. On the Computer Name tab of System Properties, Change… renames the machine and switches Member of from Workgroup to Domain in one action.

Two accounts, two rules. The local administrator you create is per machine, and Windows LAPS should manage its password: unique to that machine, rotated, and held in the directory for the rare time somebody needs it. A shared local admin password is a textbook lateral-movement risk, learn it on one machine and you have it on all of them, and LAPS is a common interview question. The account that authorizes the domain join is a third thing again: a delegated account, granted the single right to create computer objects in the directory and issued to whoever builds machines.

The join creates a computer account in the directory, gives the machine its own credentials, and establishes the secure channel to a domain controller. Membership is read at startup, so the join takes effect only when the restart finishes. When the machine comes back, sign in as a domain user to prove it took.

A hand build leaves the applications to you, so you install the baseline yourself. On a real desk those come from a software portal, winget, or an SCCM or Intune package, never from a search result: the top hits are sponsored mirrors, and a wrong click puts junkware on a machine that already holds a directory identity.
The steps in real-world terms

Every screen in both flows stands for something a technician actually does. This is the mapping, in the order the builds run.

Step in the consoleWhat it is in the real world
Deployment SOP / Manual Build SOP The build runbook. Account names, passwords, naming convention, read before touching the machine.
Choose the workstation Picking the hardware off the bench. Desktop and laptop cable up differently.
Physical setup Benching the unit: power, network, display, peripherals, before first boot.
PXE Boot Catching the one-time firmware boot menu during POST, with a few seconds to do it.
Boot Menu Choosing the network adapter as the boot device for this one start, on the address family the service actually answers on.
Deployment wizard sign-in Authenticating the preinstallation environment to the deployment share with a service account the build owns.
Naming the machine Setting the task sequence variable that becomes the hostname, to the corporate convention.
Task Sequence Progress The unattended run: partition, apply image, install apps and policy, join the domain, restart between phases.
First-boot setup screens The out-of-box experience on a factory machine, written for a home user setting up their first PC.
Terminal, then a local account Creating the local administrator a hand build needs before it can be joined to anything.
Privacy toggles The settings an imaged machine receives from policy, set by hand here.
Computer Name/Domain Changes Renaming the machine and switching it from a workgroup to the domain, in one action.
The join credential prompt Presenting an account with the delegated right to create a computer object in the directory.
Restart after the join Applying membership and establishing the secure channel to a domain controller.
Sign in as Other user The first domain logon, which is the proof the join actually happened.
Installing the baseline apps Application delivery, which on a hand build you do yourself.

What the same job costs on a real bench

Time is the first difference and the easiest to misjudge in an interview. A real task sequence runs the length of a long lunch, and a domain-join restart takes minutes. Plan a bench day in machines per day, and say so when somebody asks how long a refresh of forty laptops takes.

The imaging server is the second, and it is a job somebody holds. Here you consume a task sequence; at work a deployment engineer builds and edits them, keeps distribution points stocked so a branch office pulls its image locally instead of over a slow link, maintains the boot image that machines start from, and curates driver packs per hardware model. Drivers go past as one line in the progress list here. On a bench they are an hour of the job and the usual reason a brand-new model will not image on the day it arrives, which is why a good shop tests a new model before it buys a hundred of them.

And the names are ours. The operating system is Workstation OS 11 Pro and the directory is Directory. The steps underneath match the real ones.

Which flow, and where it ends up

The two builds you can run here end the same way: a named, domain-joined workstation on the shelf. Cloud Provisioning ends somewhere else, on a machine that reaches the person sealed and takes a cloud identity instead, and it arrives in a later version of this tool. Which one a machine gets is a judgment call, and the difference is worth being able to state in one sentence at an interview.

Which build this machine gets

Server Imaging is for a batch

  • Twenty new starters, a lab refresh, a floor of identical desktops.
  • Needs infrastructure that is up and a network you control.
  • Costs five inputs and a wait, and building those by hand would be a week of somebody’s life for a worse result.

Manual Domain Enrollment is for the one-off

  • A shared kiosk, a lab machine, a spare that has to go out this afternoon, a model the image was never tested against.
  • Also the answer when the imaging server is what is broken: PXE not answering, a distribution point that has not replicated, a branch office behind a dead link.
  • Needs only the machine, the network and an account with join rights.

Cloud Provisioning is for the person you never meet

  • A new starter three time zones away, a replacement sent straight from the vendor, anybody the bench cannot reach.
  • Needs the device registered to the tenant and a profile waiting for it, and nothing on your own network at all.
  • Costs the longest first-boot wait of the three, and buys a machine no technician ever opened.
Every hand build is one technician’s memory of the standard, and the divergence surfaces eleven months later, in a ticket where two supposedly identical machines behave differently.

A useful rule: if you will do it more than three times, image it. If the machine is going to somebody you will never stand next to, provision it. If the imaging server is what is broken, build by hand and raise a ticket about the imaging server.

A finished build puts the unit on the PC Shelf, listed by its build method, device type and hostname, where it sits as an unregistered build until somebody records it and hands it over.

A ticket usually needs both onward paths. In Asset Management the build is recorded with Register asset and handed to a person with Check out replacement on the requester’s record. To get it to somebody outside the building, the shelf has an Open Ship Manager button, and Ship Manager is where the package is addressed and sent.

From a finished build to a person

Build finishes
On the shelf
Registered
Checked out
Shipped
The unit leaves the shelf the moment it is checked out, and shipping is final, whether or not it was the right machine for the ticket.

Part three

Practice

Build a machine for a ticket that needs one, get it to the person, then walk the other method once.

Open this module in the simulator